Facebook Conversion Tracking Instructions
Updated: August 8, 2024
Congratulations on taking the first step to better ads reporting, better conversion tracking, and better performing ads! This app can be installed directly in the Commerce7 app store, just select the “Facebook Conversion Tracking” app by Treefrog Digital and 5forests. But before you start, you’ll need to make sure your Facebook account is ready to go.
Our app allows you to retain full administrative control over your accounts, and these setup instructions will walk you through areas of the Facebook Business Manager that all business owners and media teams should be familiar with. Please allow yourself 20 minutes to complete these steps.
Table of Contents
Facebook Business Manager Setup
If you have a Business Manager account already, you can skip to the next section.
Create a Business Manager Account
You will need a Facebook Business Manager account in order to use this app. Even without this app, we always recommend using the Business Manager to handle your advertising on Facebook.
Here is a handy guide to getting started with Facebook Business Manager: https://zapier.com/blog/facebook-business-manager/
This step is the longest if you don’t already have an account. Follow the setup link above and take your time, this will be the backbone of your entire Facebook marketing and management system!
We highly encourage users to switch from the “Meta Business Suite” back to the more advanced “Meta Business Manager” view. Instructions on the link above.
Create a Facebook Ad Account
Once you have a business manager account set up, you will also need an Ad Account and a Facebook Dataset attached to that ad account. The link above goes over how to set both of those up.
Make sure you have a valid payment method connected to the ad account!
Note: if you are a marketing agency installing this app on behalf of a client, please ensure the Dataset is created in the clients Business Manager account and not your own. The clients Business Manager account should own all assets, including the Dataset and page and ad account, and they should provide you access as a Partner. Anything else is a recipe for disaster.
Create a Dataset
Note: in 2023, Facebook rolled out what they call a “Dataset”. This Dataset is a combination of all tracking channels, such as your website events and your offline events. If you had an existing pixel, it should have been converted to a Dataset automatically. You only need one Dataset in your account.
Remember to edit all current and future Meta ads to track online and offline conversions on this new Dataset, you no longer need the old “Offline Events Sets”!
To start, you will need a Dataset. If you previously had a Facebook pixel, it should have been converted to a Dataset automatically by Facebook. If you do not have a Dataset, please create one.
Head to Events Manager > Sources and look for one of two things:
First, look for an existing Dataset, indicated by the symbol that looks like a network of bubbles instead of the old symbol of a laptop.
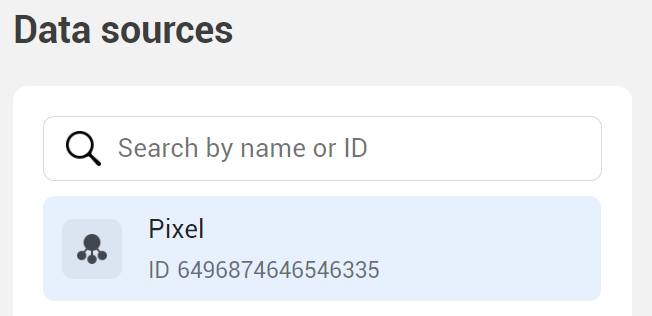
If that does not exist, look to the left for a green circle with a plus sign symbol in it. Click it to open the “Connect a New Data Source” modal, and see if “Offline” is available or greyed out. If it’s available, click that and create a new source. Don’t worry, you can add online events to this as well!
Event Tracking Setup
Facebook Conversion Tracking
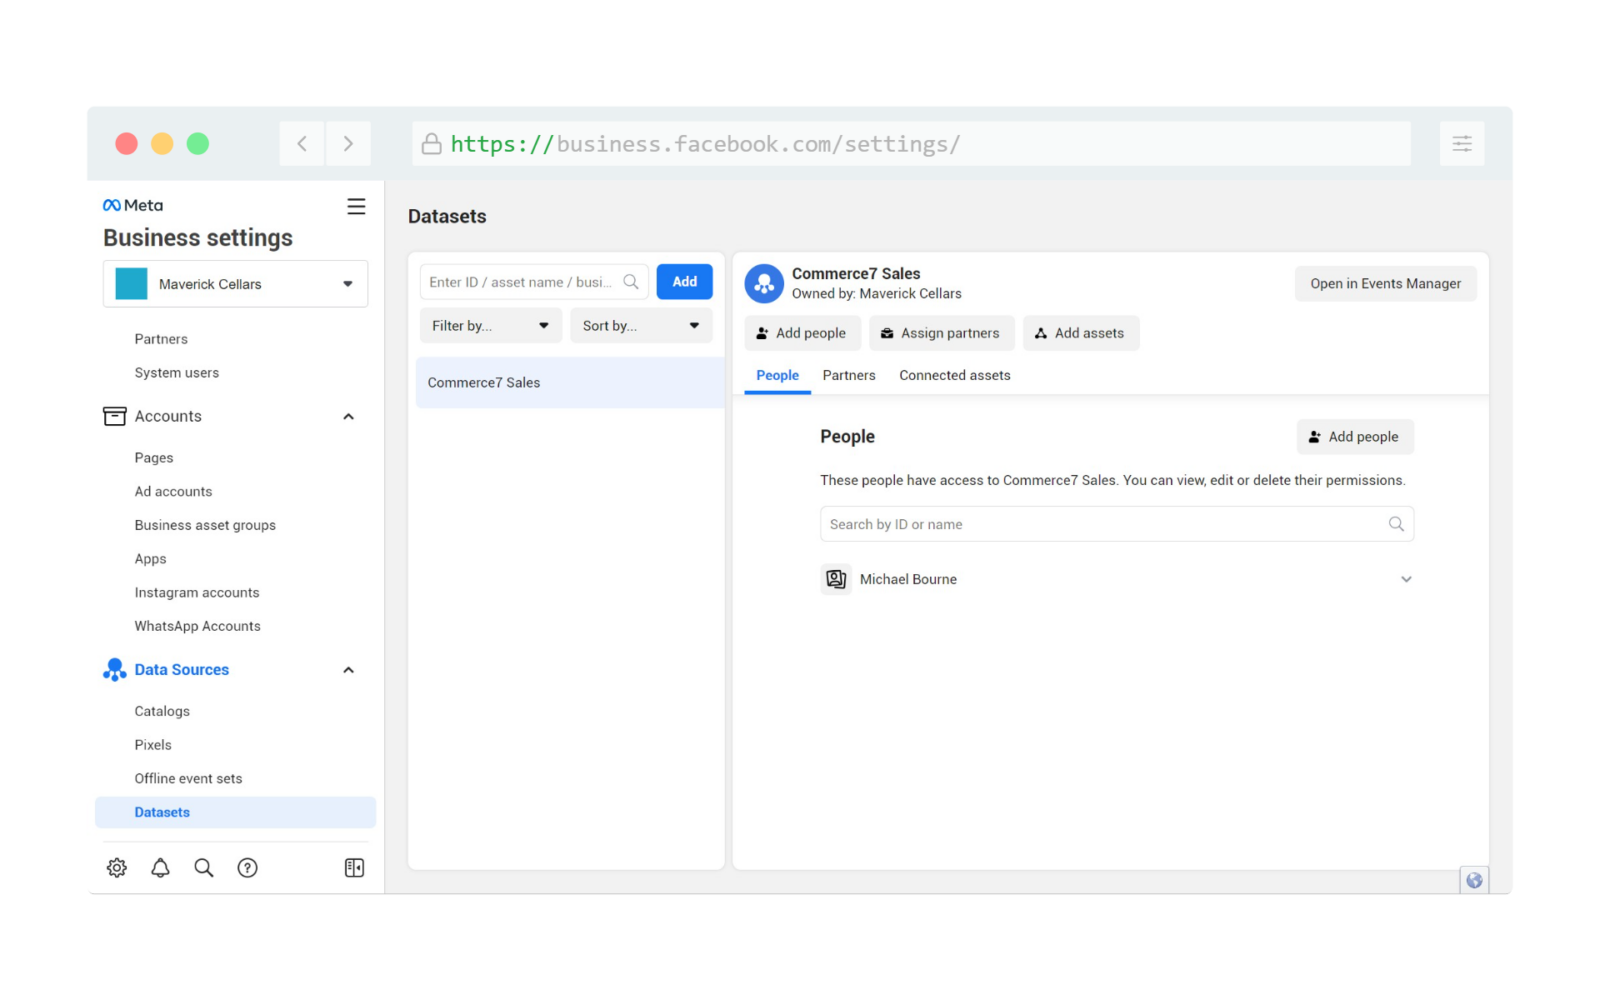
In the Business Settings screen of your Business Manager account, find your Dataset under Sources, click it, and then click both the People tab and the Connected Assets tab. Under people, add yourself and anyone who needs access to event tracking and ads (with full permissions). Under assets, connect your ad account.
After that, click the grey “Open in Events Manager” button at the top right of that screen shown below.
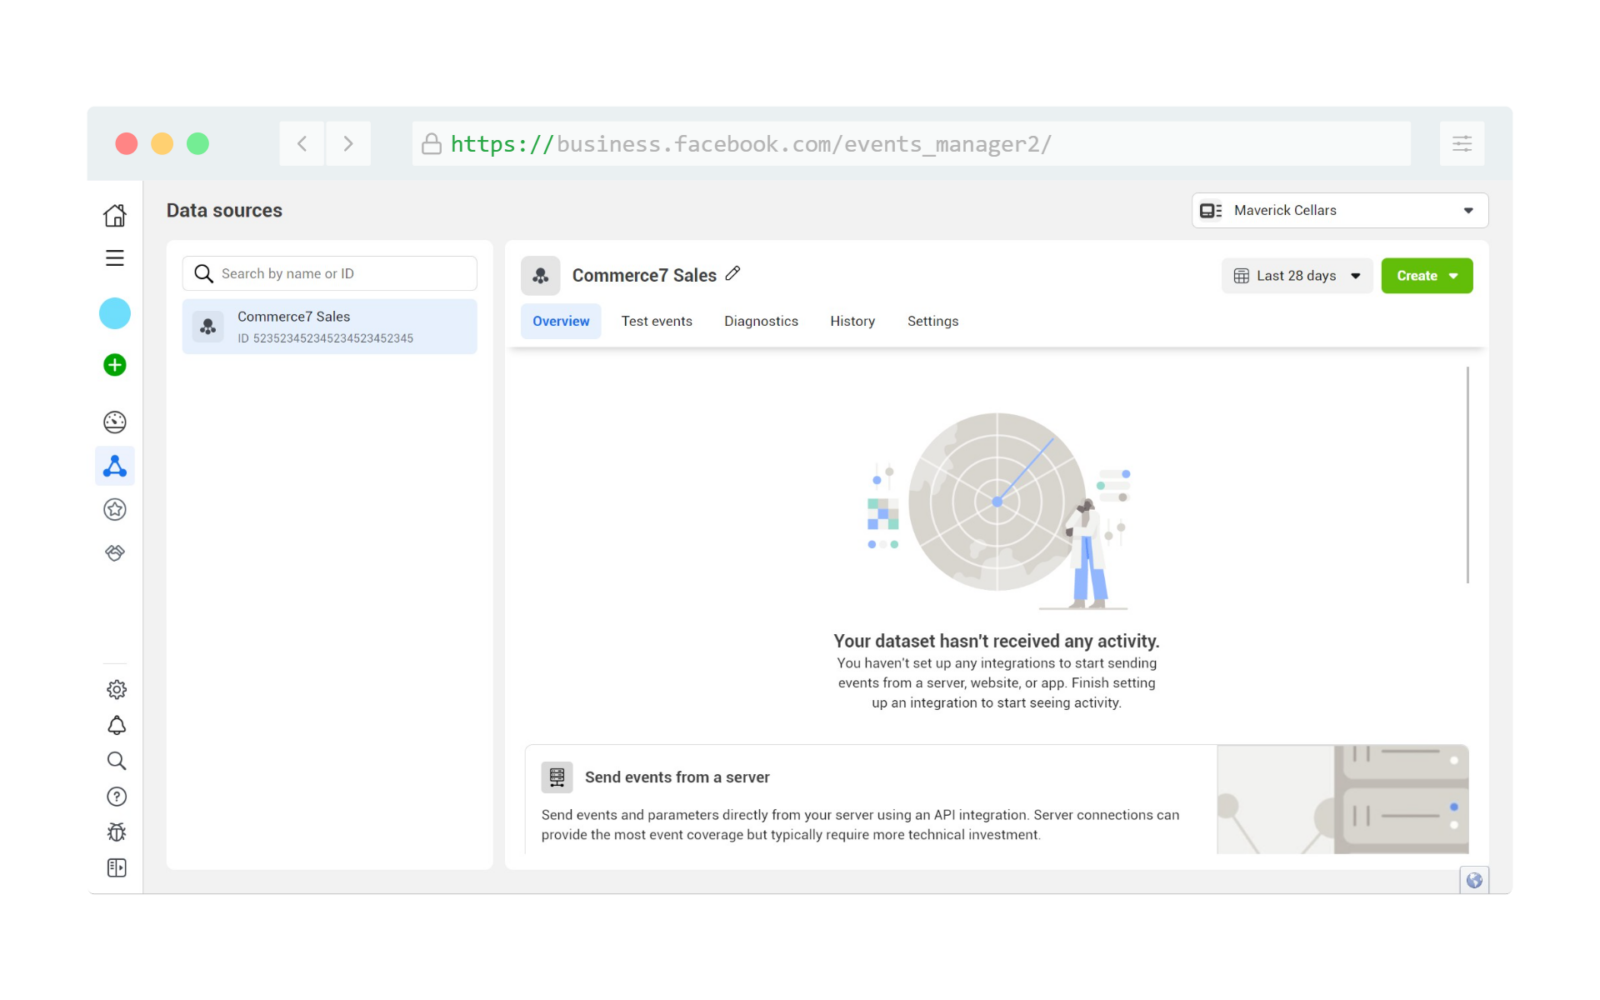
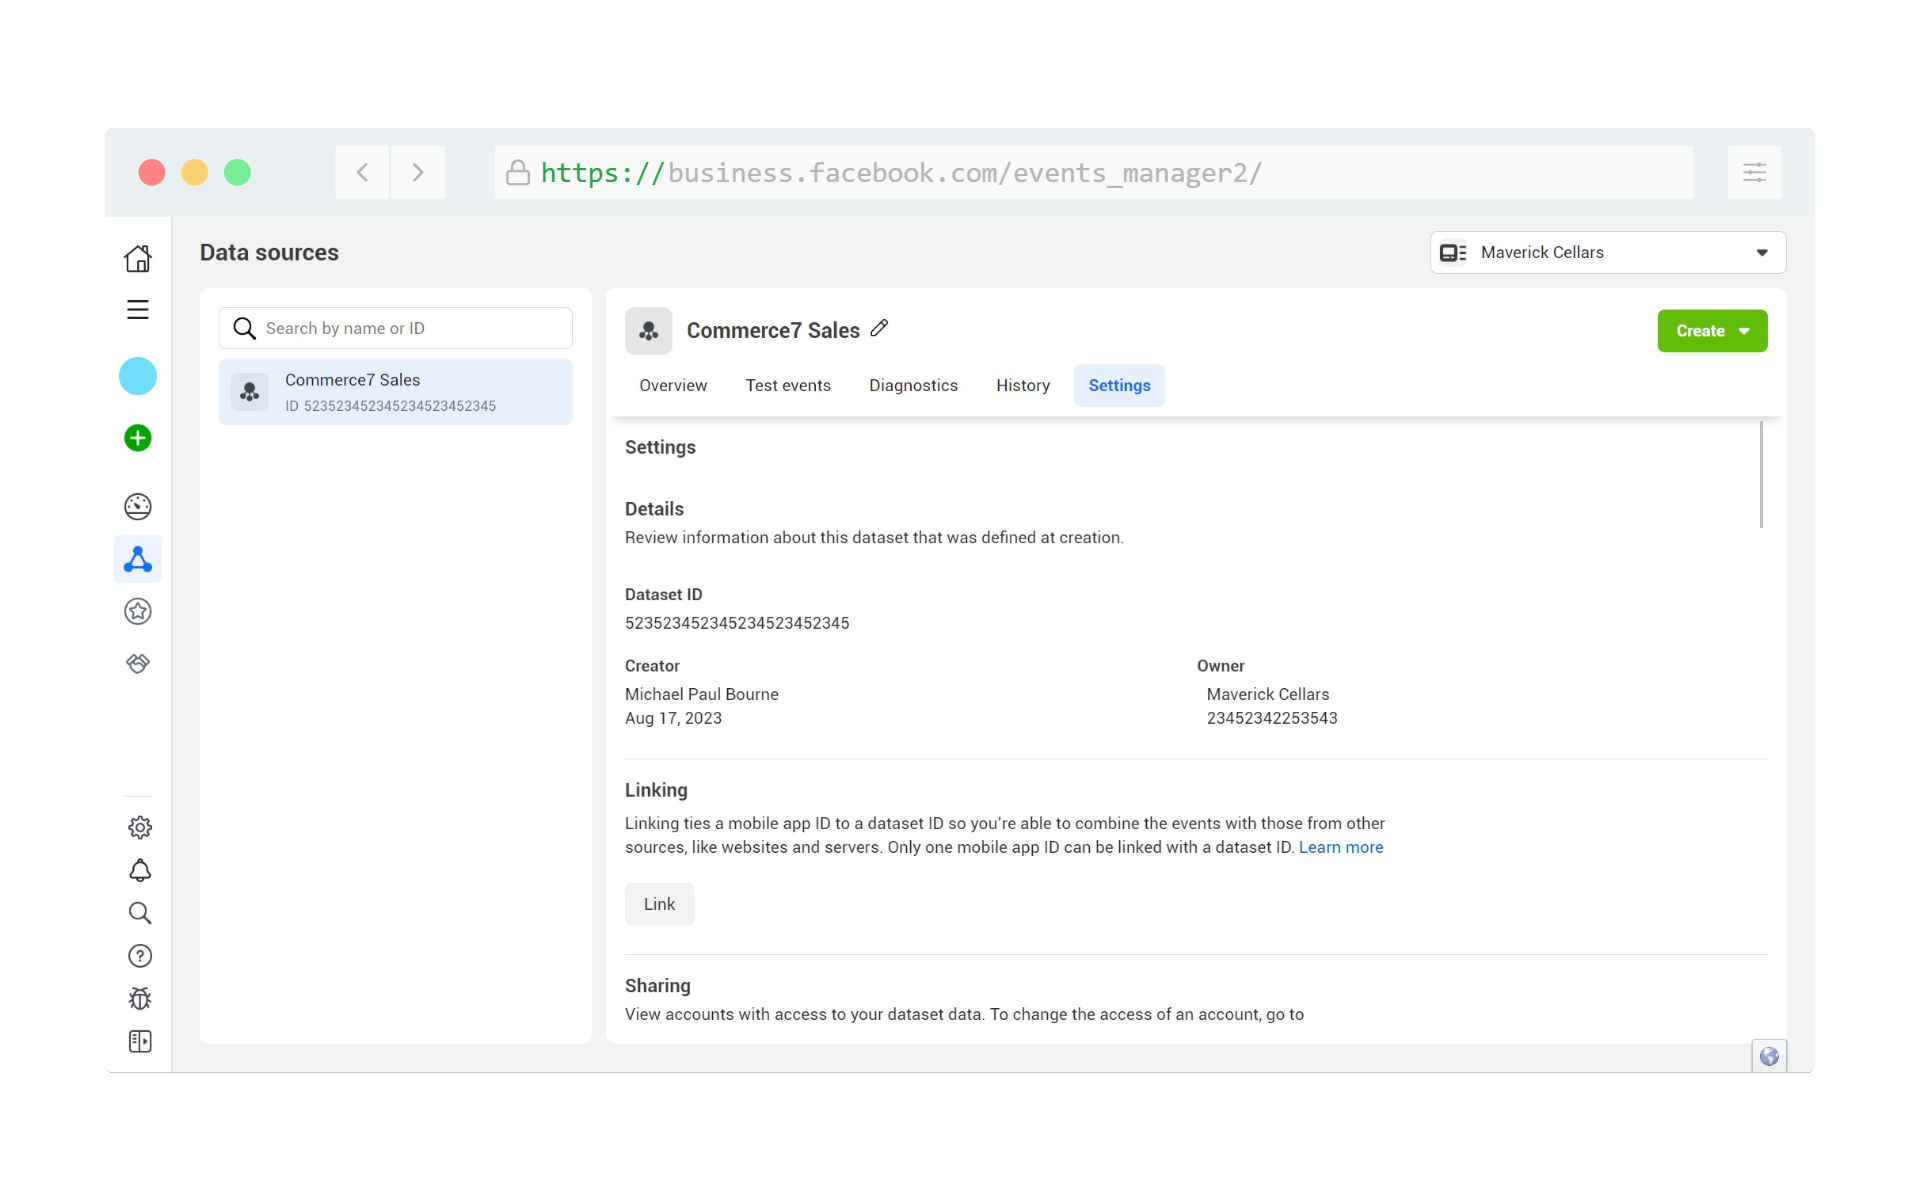
Once you’re in the Events Manager screen, head into the Settings tab on your Dataset.
Copy down your Dataset ID, you will need this to setup the Commerce7 app!
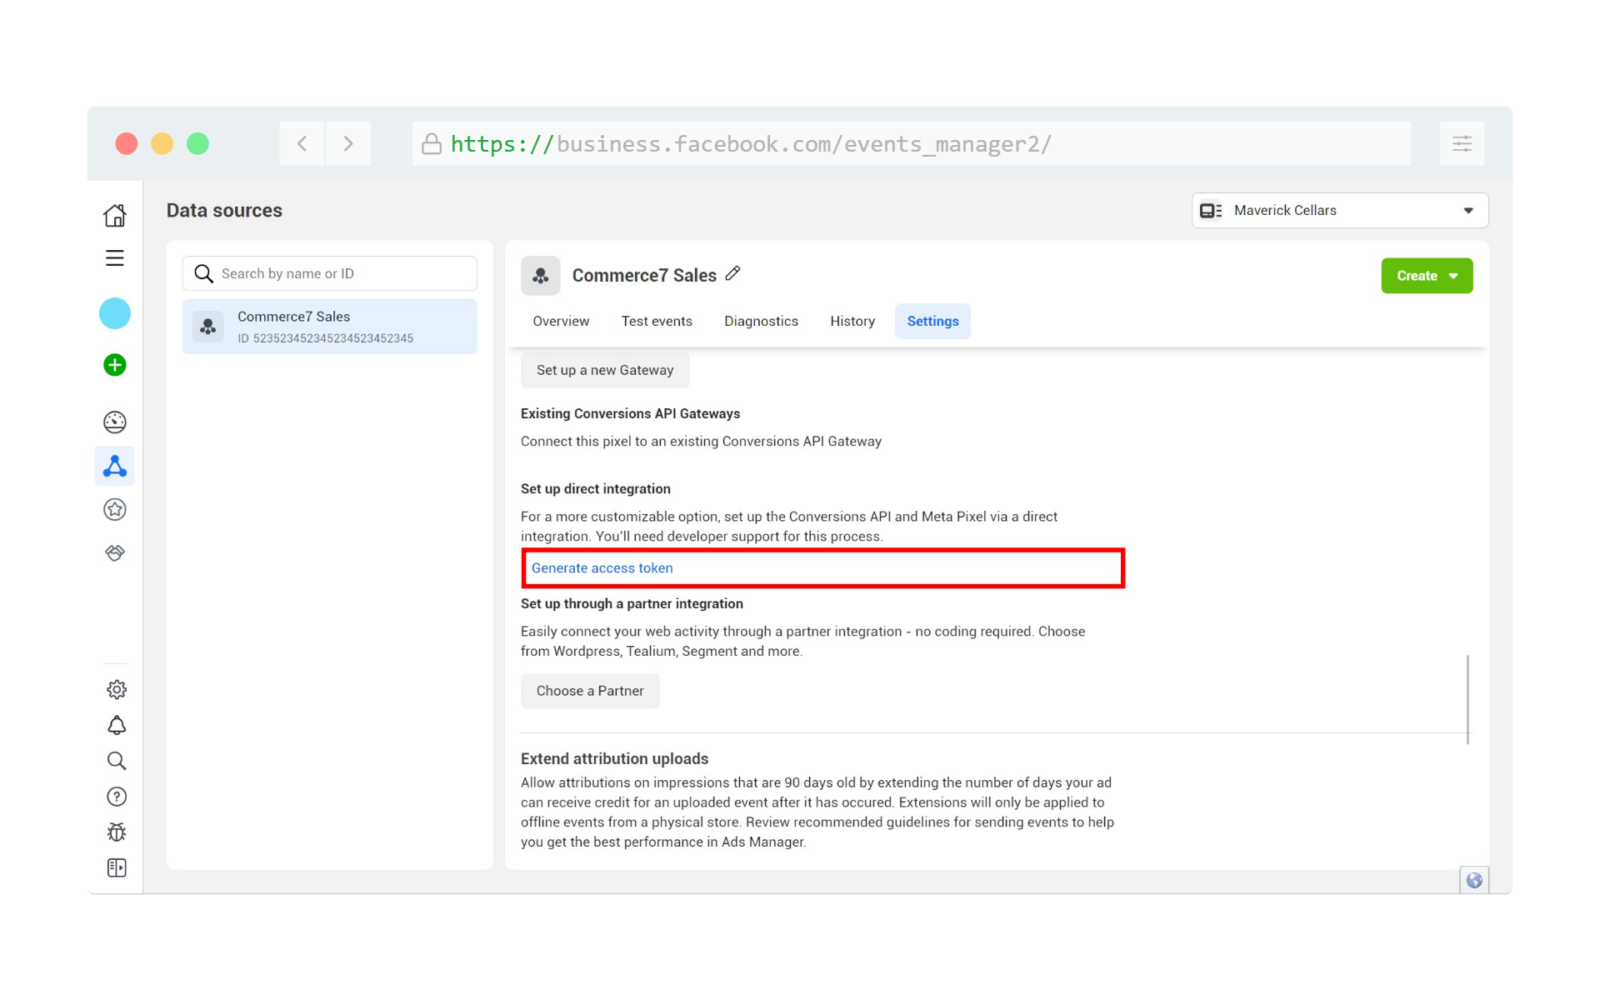
Scroll down this page until you see the link “Generate access token“. Click this link and copy the token that appears in a modal, you will need it later!
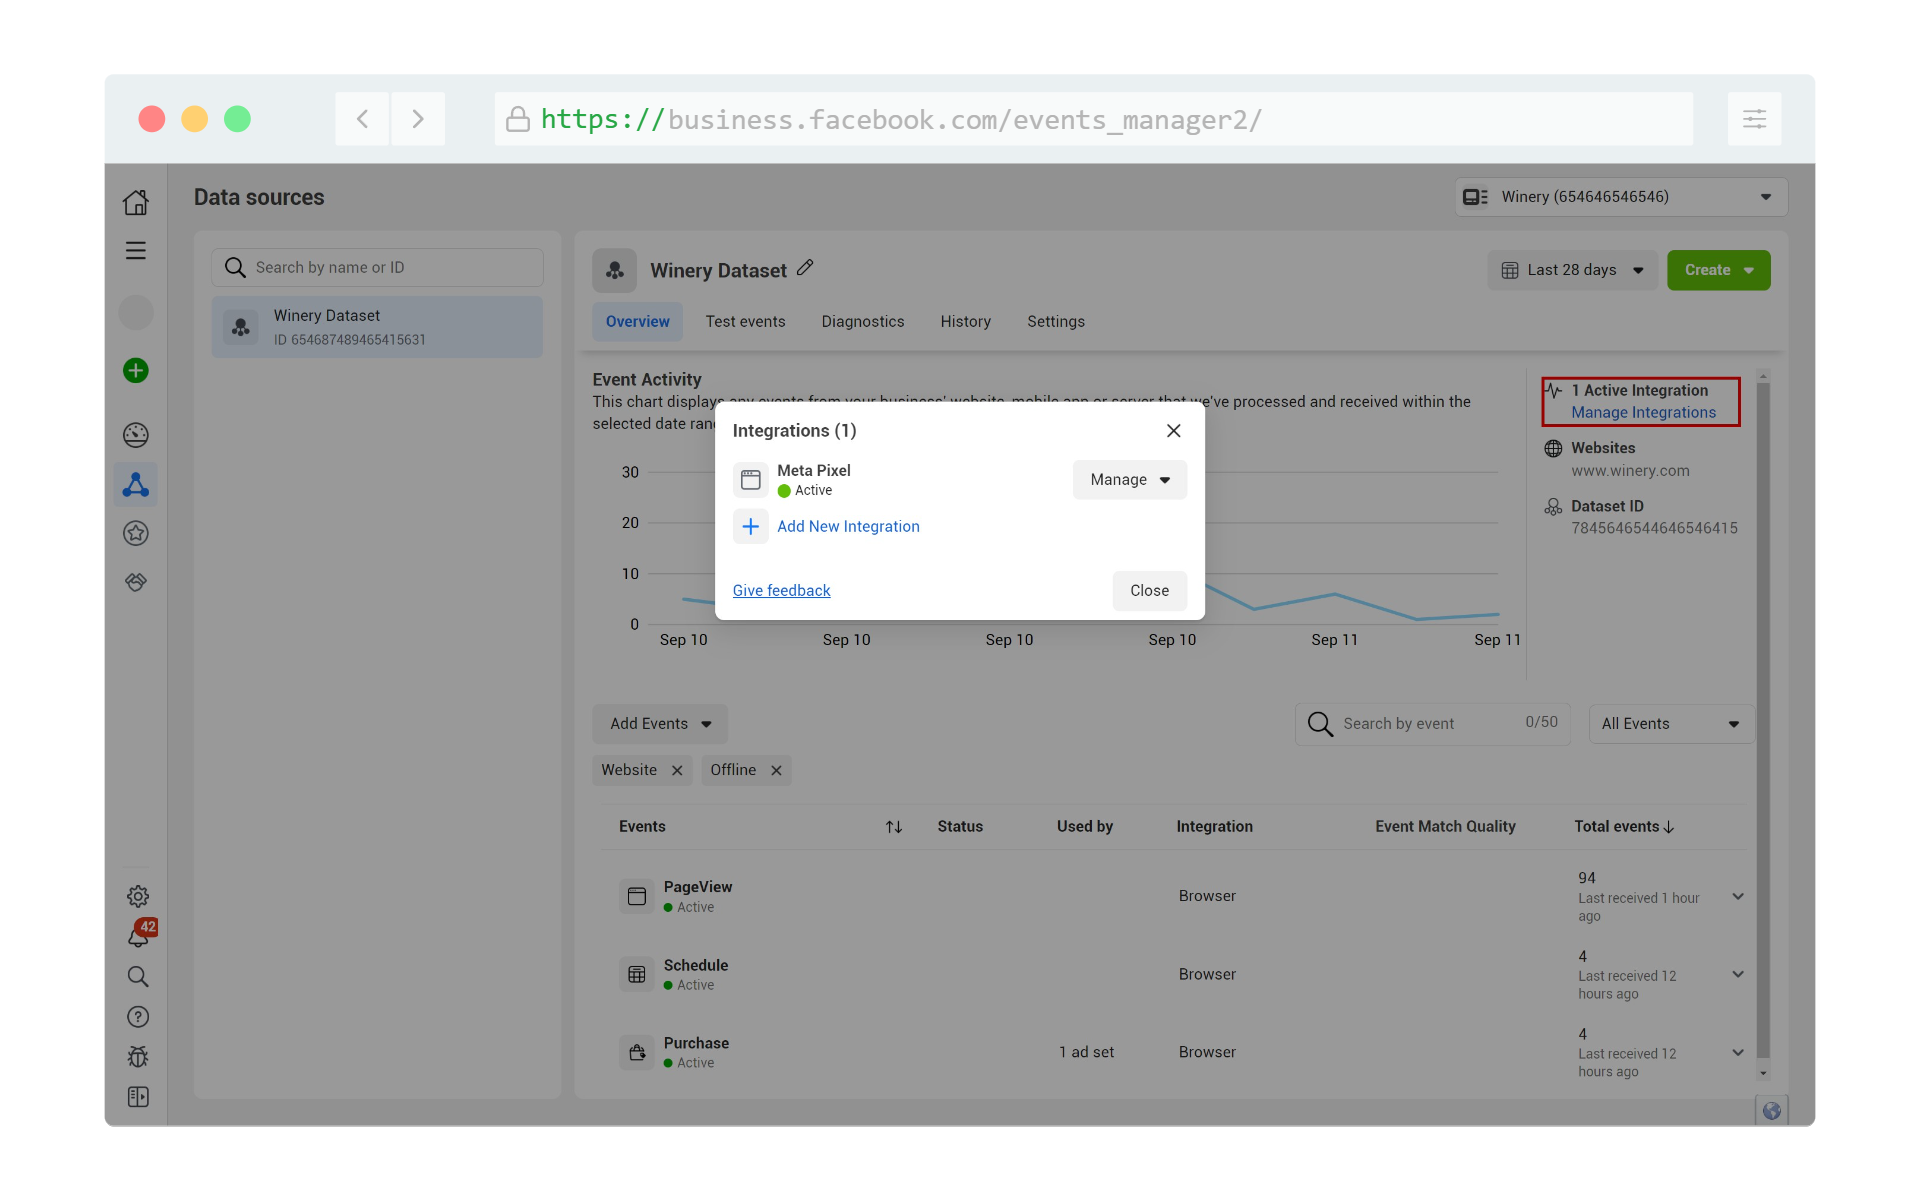
Once you have your token, click on the Manage Integrations button in the Overview tab in Events Manager.
You may need previously recorded website events present in your dataset before seeing this next screen.
If this is a brand new dataset you’ve created, and you’re unable to see the “Manage Integrations” link below, email us for a copy of our GTM container so you can start tracking web events with the Meta Pixel that is part of your dataset. You should then be able to resume the setup at this step after 24 hours.
In the pop-up screen, click the Manage button next to Conversions API, or click Add New Integration and choose Conversions API.
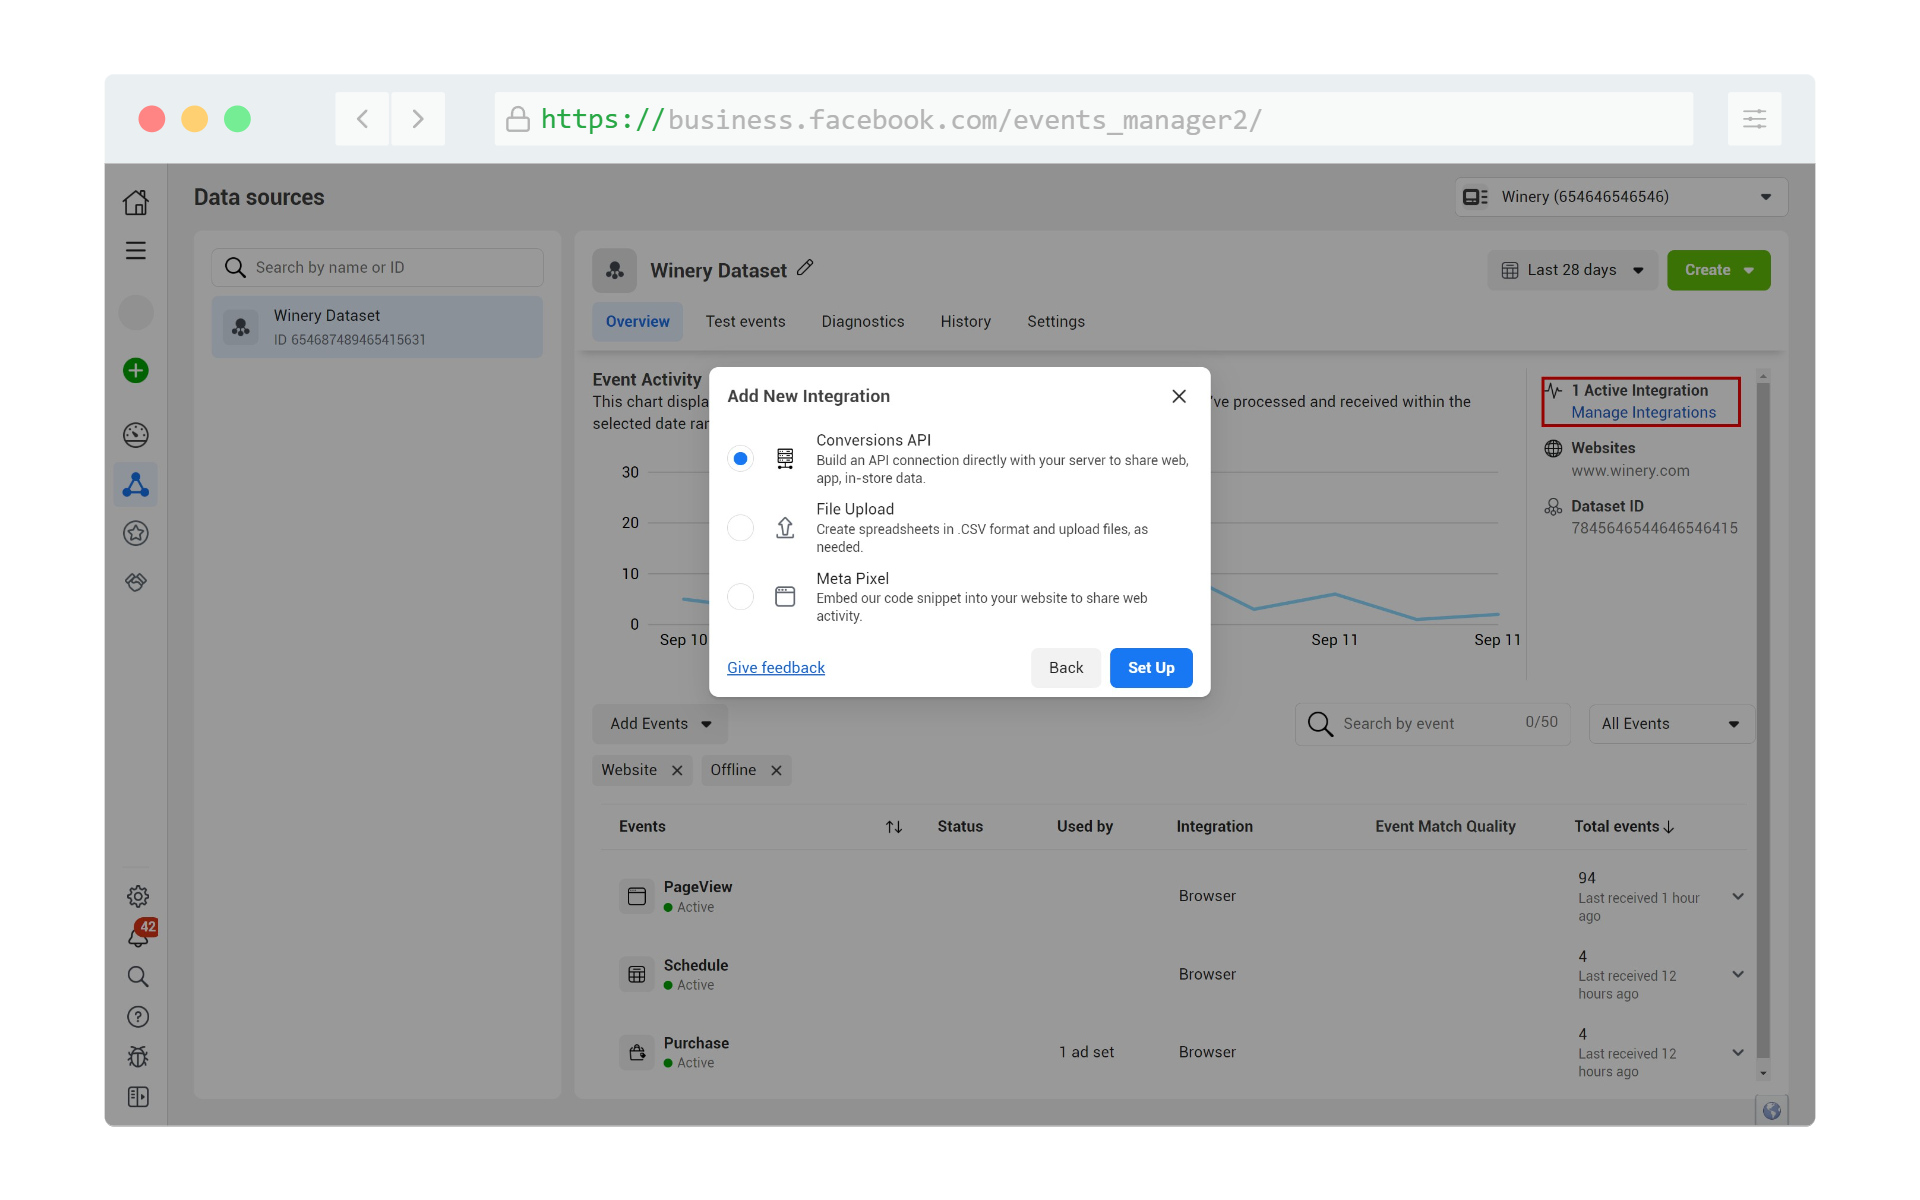
If this is a brand new Dataset and you do not see the option above, look for the blue “Set up Conversions API” button instead.
Choose “Set Up Manually” on the next step.
The following steps are all for show, and have no effect on tracking conversions, but you must follow these instructions.
- In the “Select Events” step, choose “purchase” and hit Continue.
- Under “Event Detail Parameters”, select the following: Event ID, Phone, Email, IP address. Hit Continue.
- Press Confirm Setup.
- You do not need to send instructions to anyone. Hit Finish.
Lastly, we highly recommend going back into your Dataset’s Settings tab, and enabling both “Extend attribution uploads” and “Allow historical conversion uploads” to account for reservations that happen more than 7 days in advance.
With the Dataset ID and Access Token safely copied down, please proceed to the next section.
Commerce7 App Setup
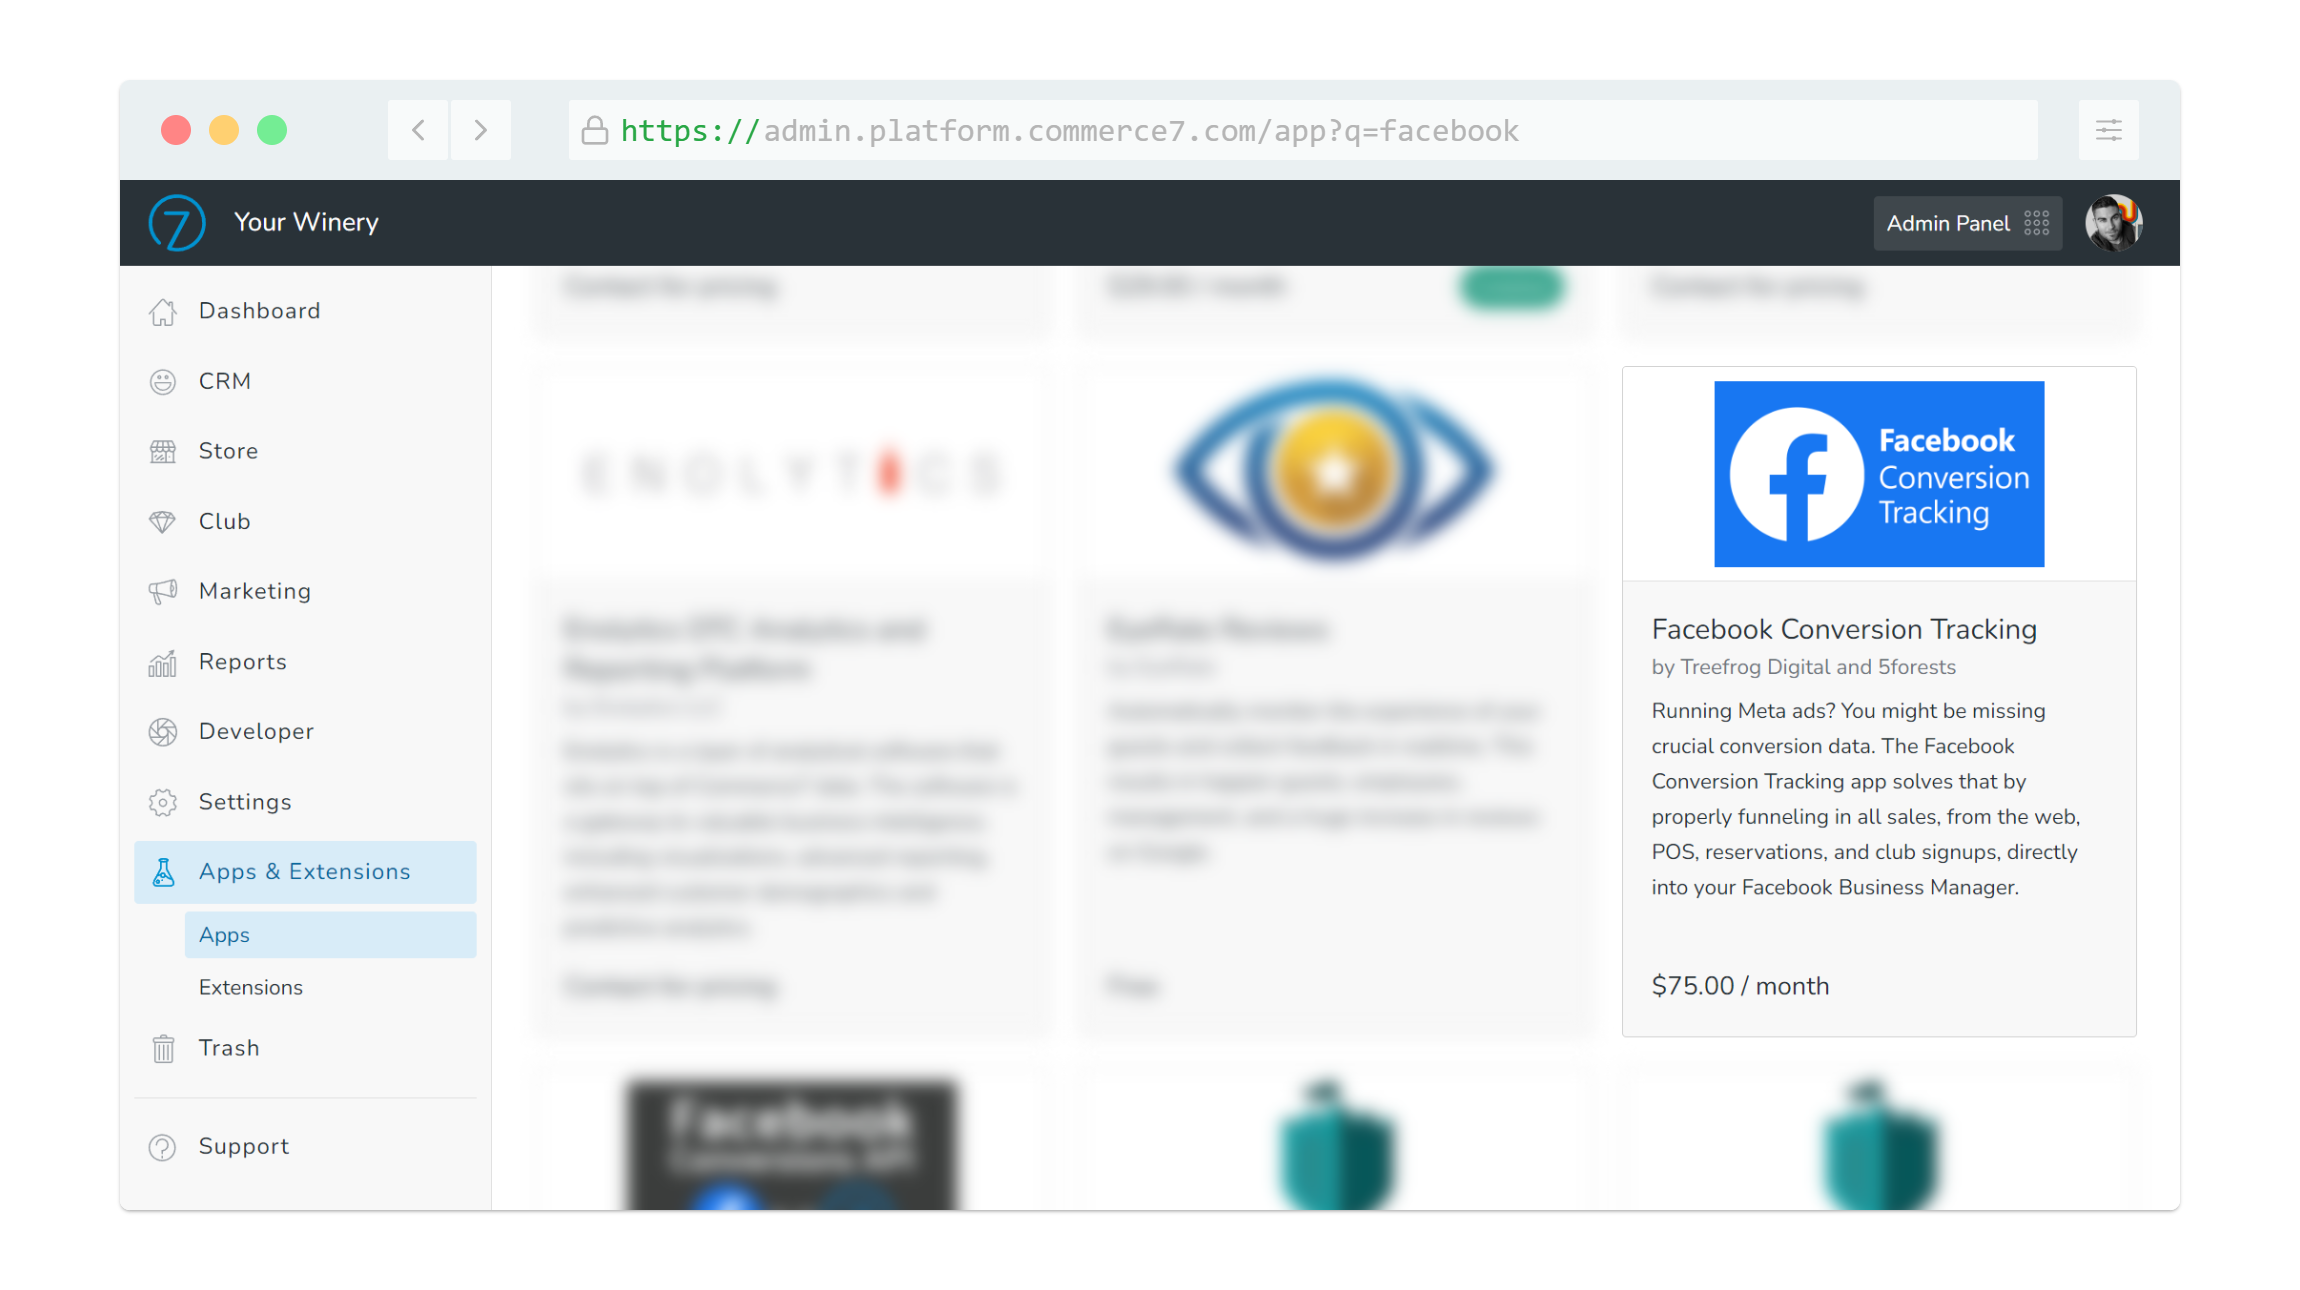
Log in to your Commerce7 admin panel. Select Apps & Extensions in the lower left navigation, click Facebook Conversion Tracking by 5forests and Treefrog Digital, and click Install.
Now the easy part! The next step is to take the IDs and Tokens just collected:
- Dataset ID
- Dataset Access Token
Head over to the Marketing > Facebook menu, click general settings, paste those two values in the matching fields and save the settings.
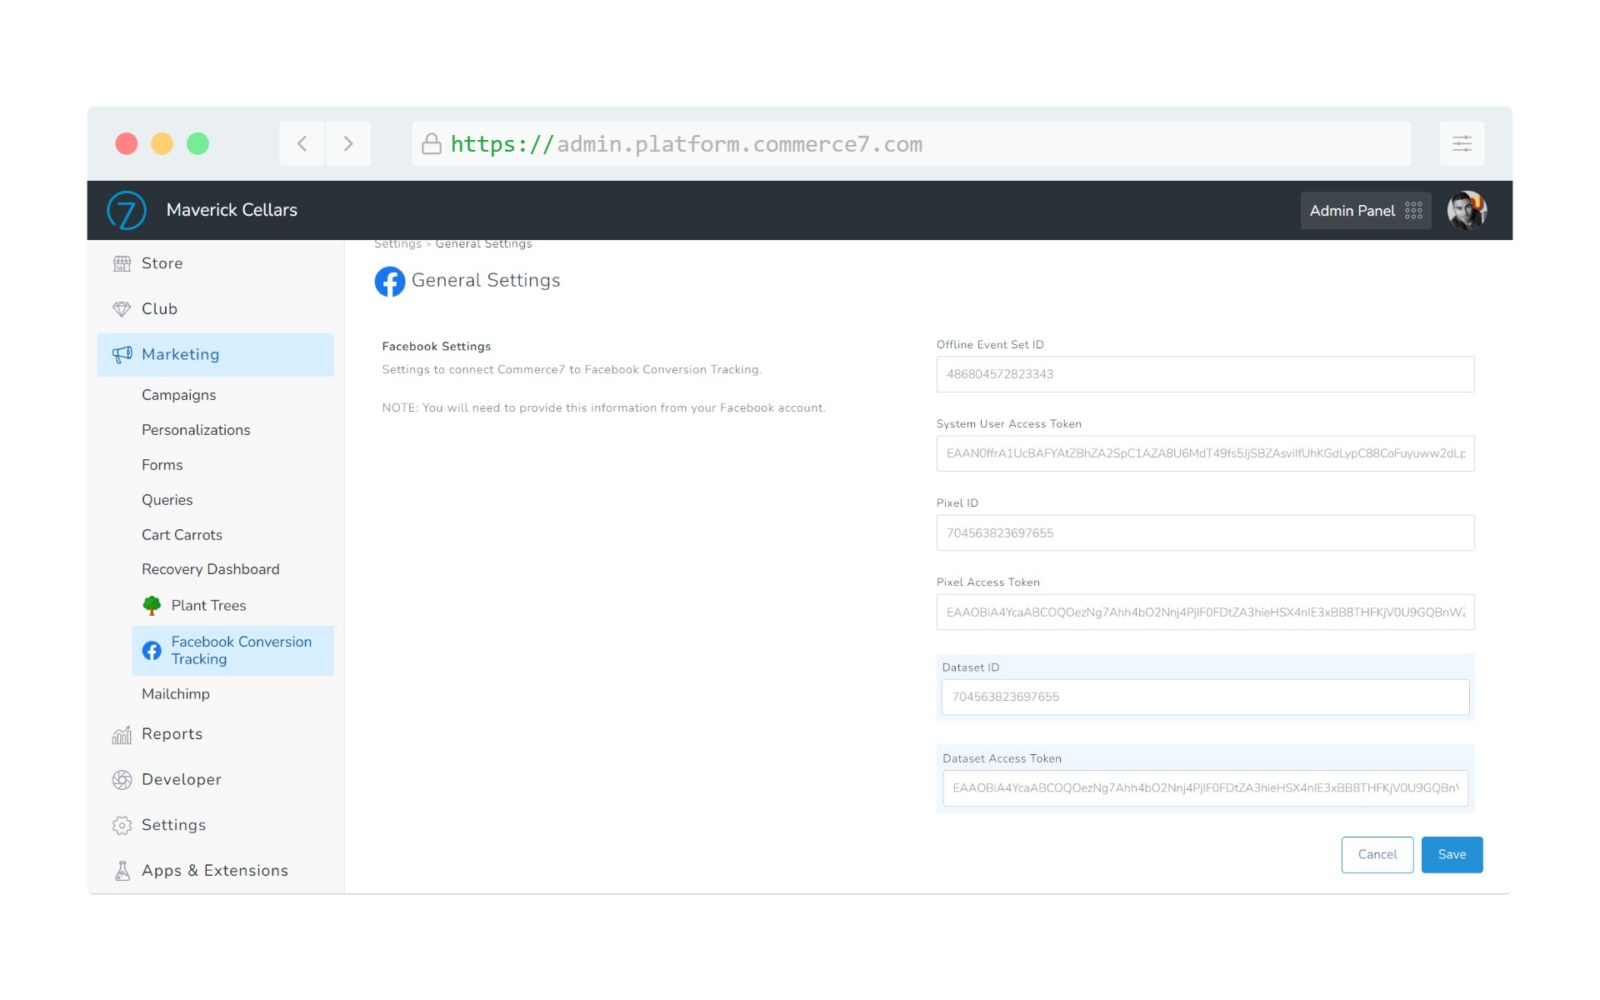
Set up is now complete!
After Installation
Read our blog for some advanced ways to use the Facebook Conversion Tracking app!
5forests will provide a copy of our starter Google Tag Manger (GTM) container to all paid app users. Please email [email protected] for a copy.
If you are tracking web events with your Meta Pixel (through GTM), purchase events need to be deduplicated. If you opt in for our free GTM container for the Facebook, this is already done for you. If you prefer to use your current setup, you will need to edit your purchase tag to include the order number as the unique EventID to help with deduplication. More info can be found here: https://developers.facebook.com/docs/marketing-api/conversions-api/deduplicate-pixel-and-server-events/
While C7 app updates that need your intervention are rare, they can happen. We encourage all Commerce7 users to monitor their Installed Apps monthly to look for updates. Updating any app may cause its settings to be reset, so the above access token generation may need to be repeated on ever update.
CCPA Compliance
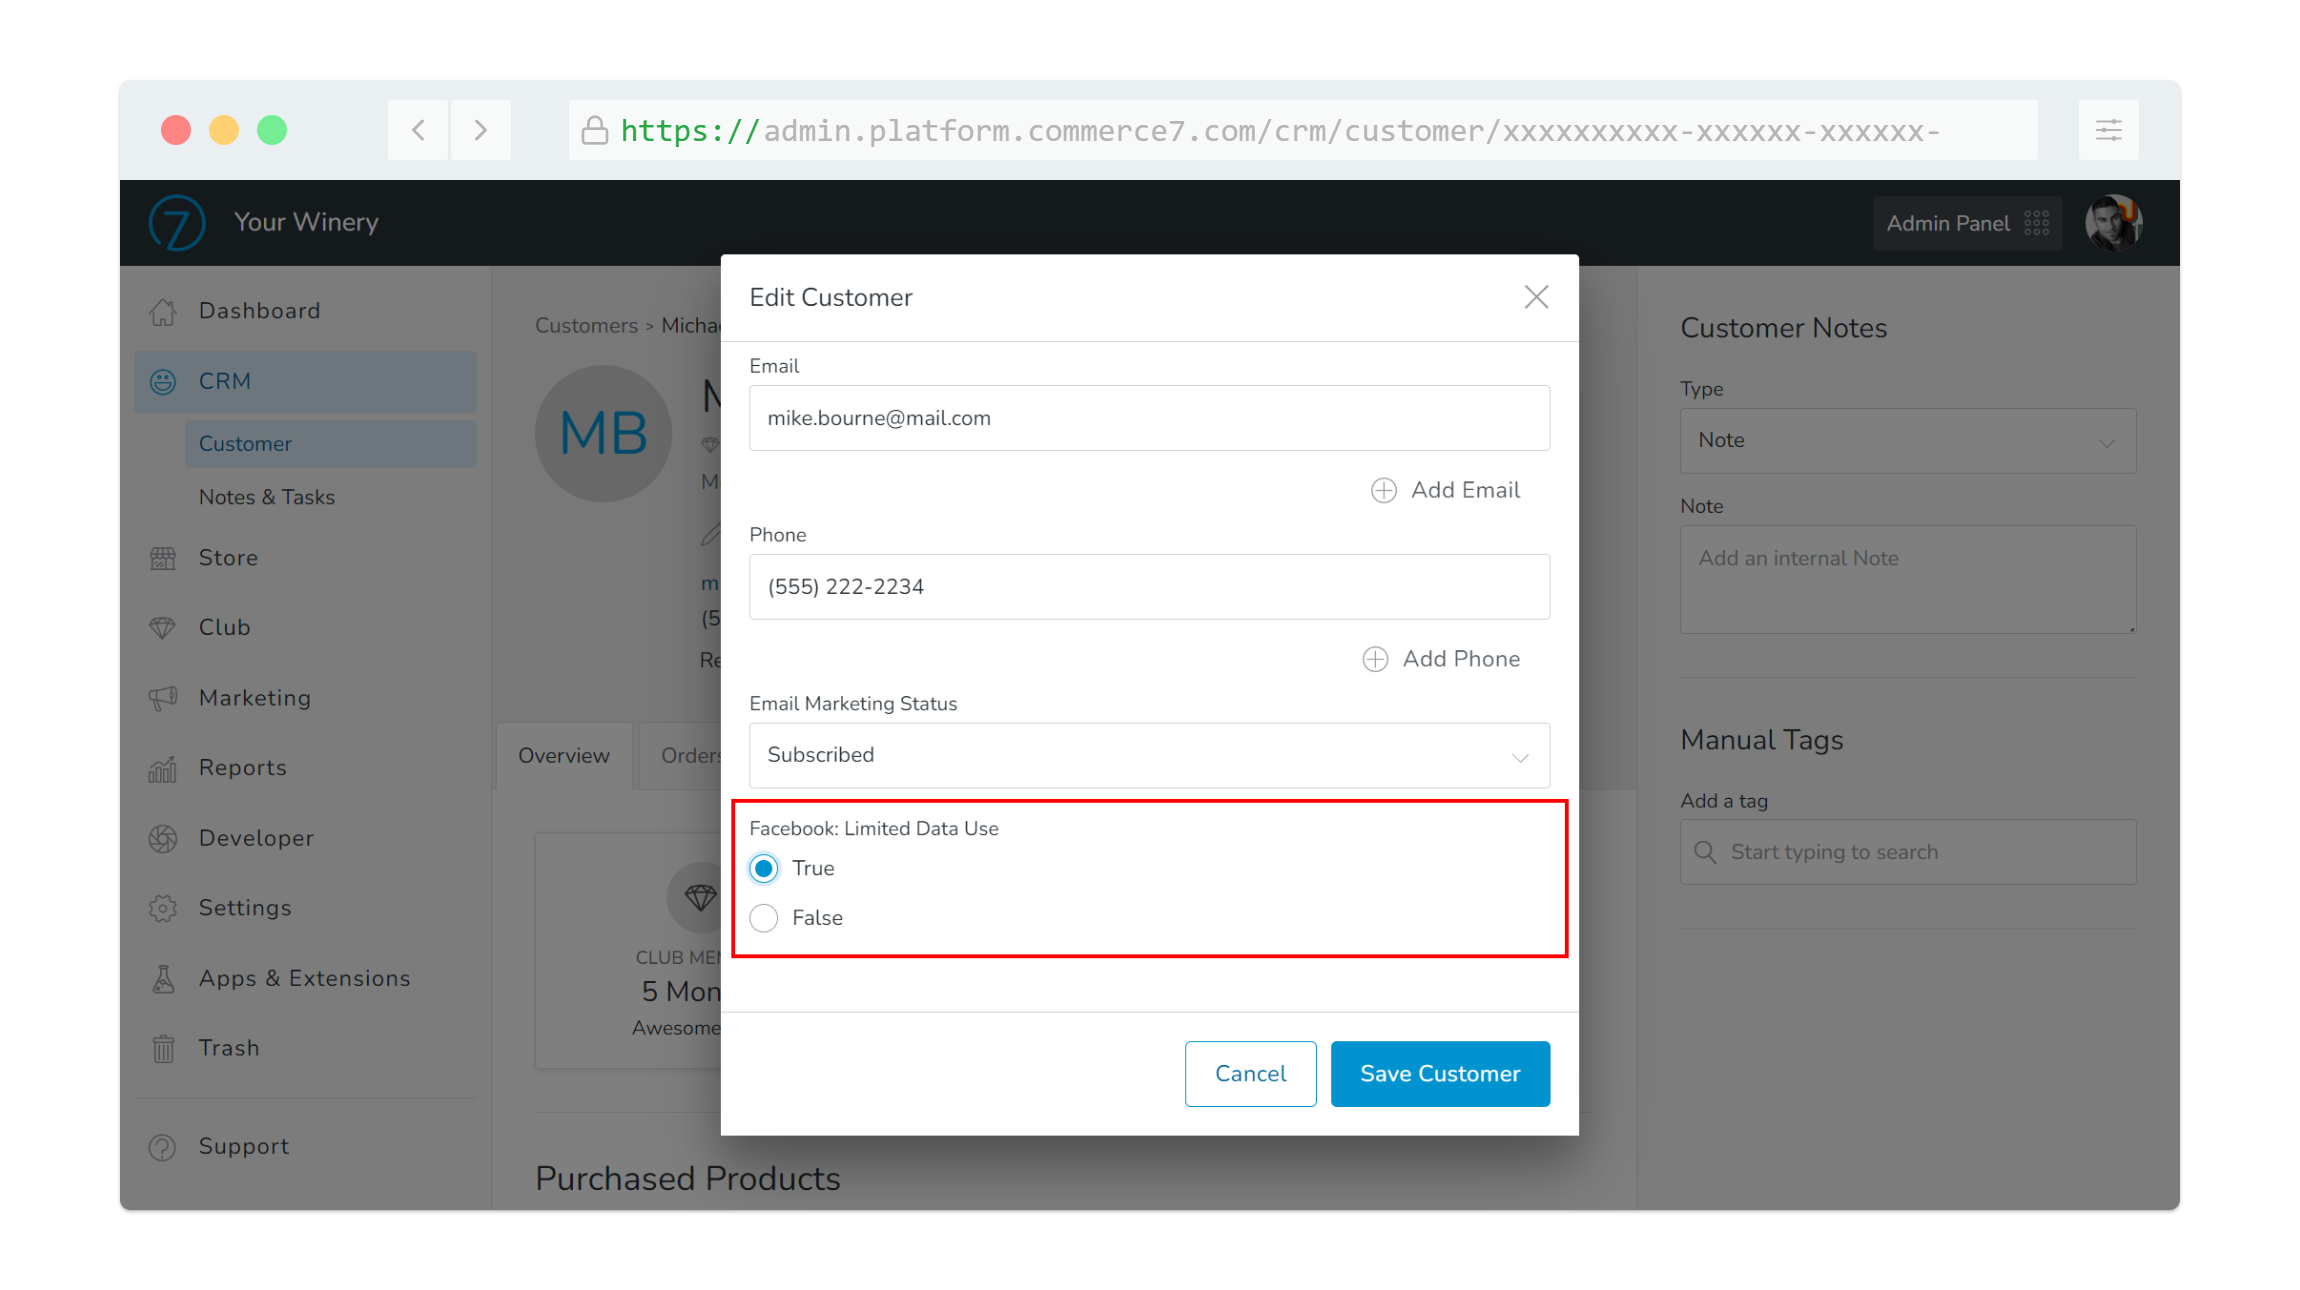
For California wineries looking to be CCPA complaint, our newest app version adds a custom user meta field called “Facebook: Limited Data Use” with a true/false dropdown. Setting this dropdown to true on a customer will result in our app sending the proper Limited Data Use headers with the conversion info, in compliance with CCPA regulations. This is handy for your manual user opt out flows, or it can be automated via API with your own privacy integration. You can read more about Facebook’s LDU system here: https://www.facebook.com/business/help/1151133471911882
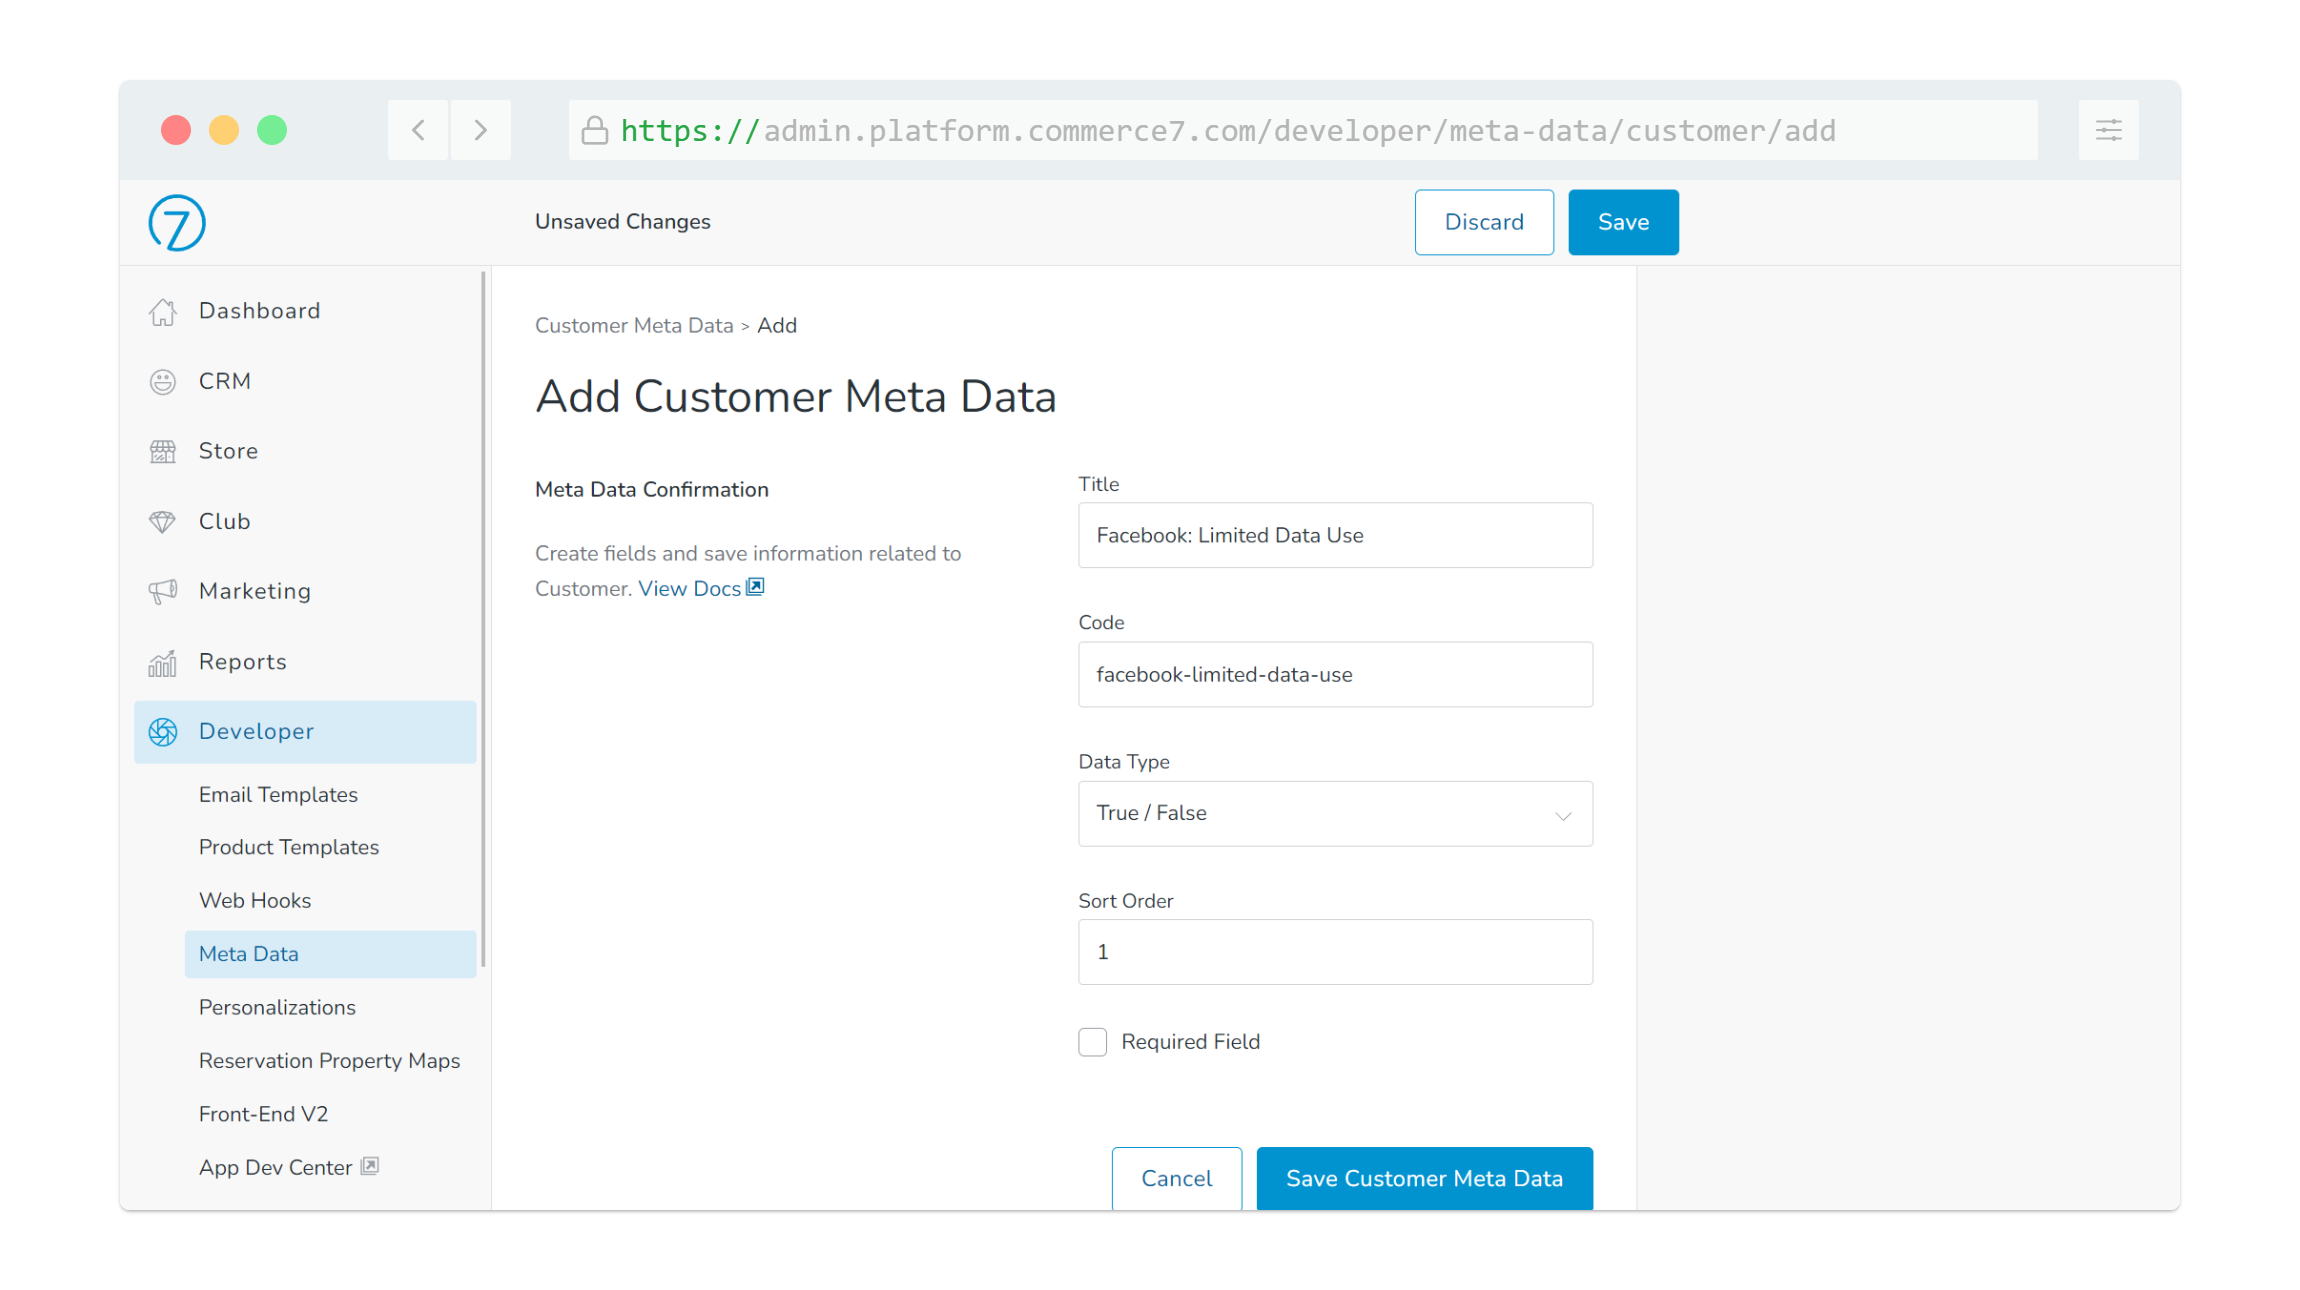
If you happened to install our app prior to this LDU field being created, or if you accidently removed it, you can create your own inside of Commerce7 by going to Developer > Meta Data on the C7 backend, then create a new custom meta data object with the code facebook-limited-data-use and the field type set to True/False. The code must be typed exactly as shown in order to work.
Advanced Support
Sometimes we may need to help wineries who run into technical issues with their setup in relation to this app. It’s rare, but in those cases, we ask that wineries invite 5forests as a Partner in Facebook Business Manager. Our partner number is 360746004725557. After inviting, you will need to assign us all above assets, and give us manage permissions. This includes your Dataset and your Ad Account.